You’ve Just Signed Up! Now What?
Welcome to GivingPress, and congratulations on your new website! If you’ve never built a website before, don’t worry; it’ll be fun – and easy! We provide step-by-step instructions and customer support to help you every step of the way. Don’t know where to begin? No worries! Here are a few things to get you started in the right direction.
Upon signup you will receive immediate access to your GivingPress account. You’ll receive two emails from us right away – one with your GivingPress account information, and one with your website login information. You can click the link indicated in the email to log into your website.
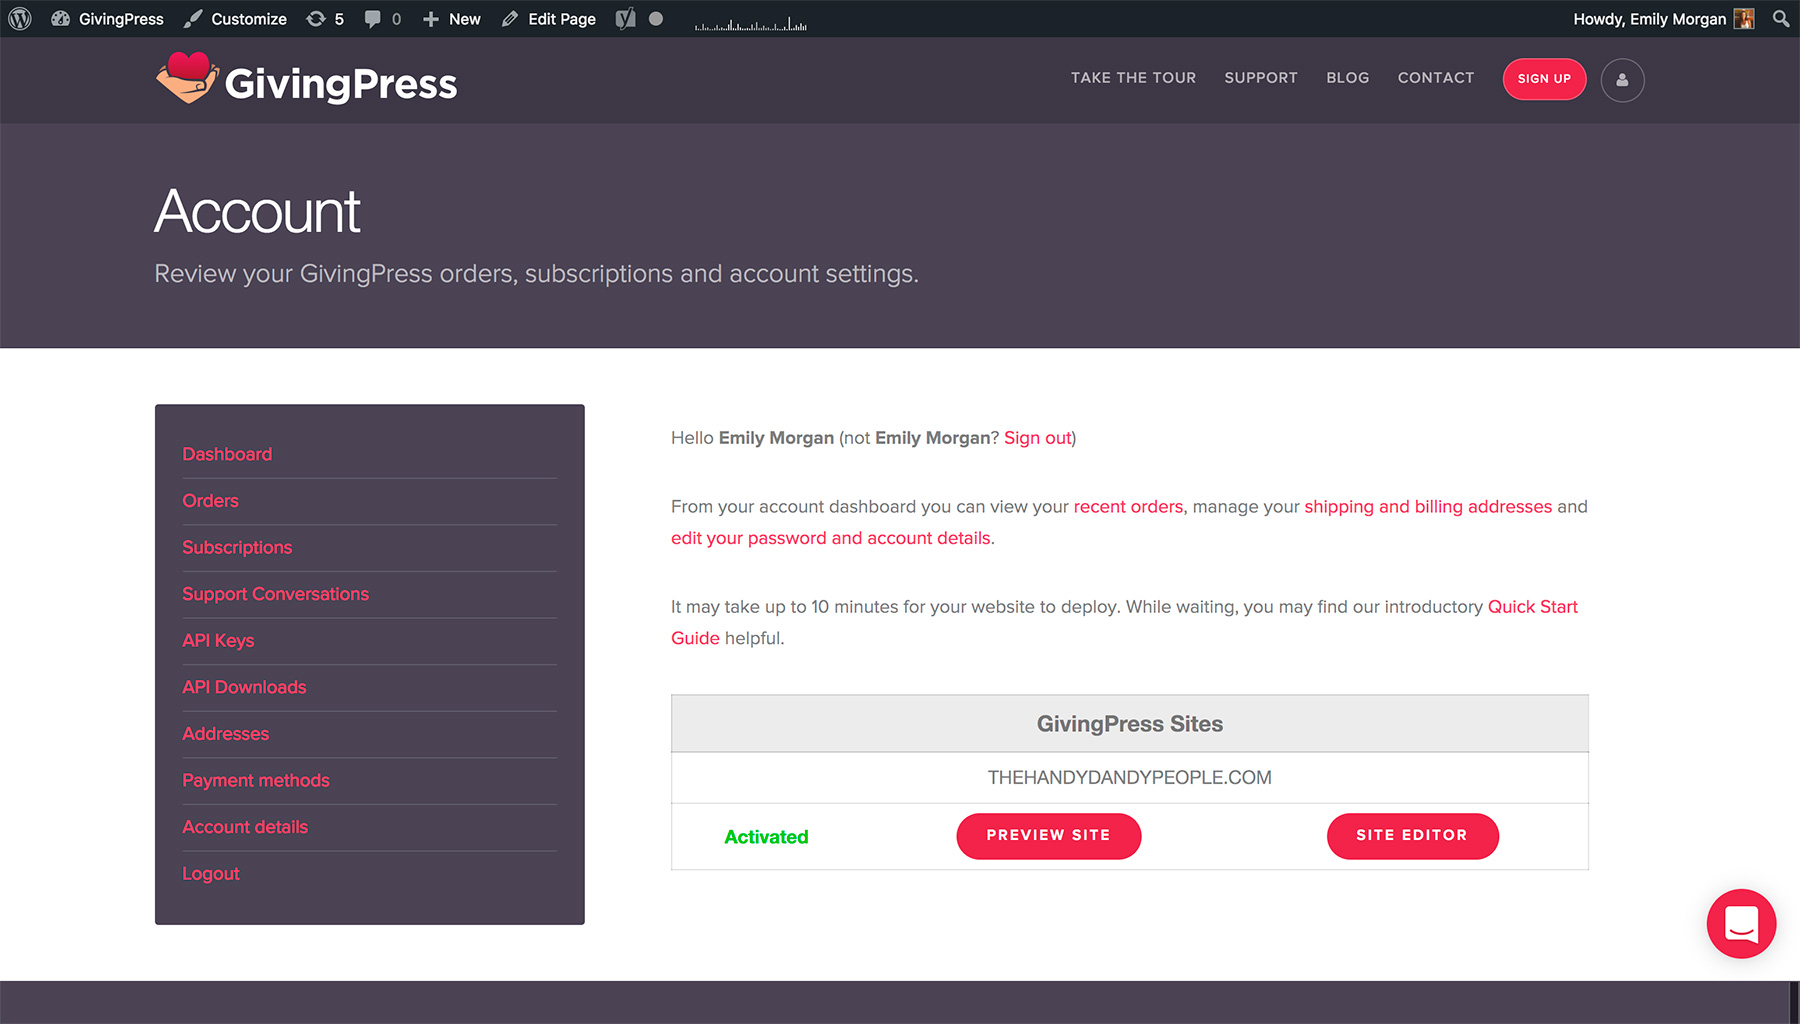
Your GivingPress Account
Within GivingPress Account you can manage billing, licenses and account details. In addition, you can view the status of your website in the account dashboard. Your GivingPress website will be deployed within moments of signing up. The status of your website will read “Activated” in the account dashboard when it’s ready (this will take about 10 minutes). Click the link from the dashboard or email to log into your website.
Building Your Website
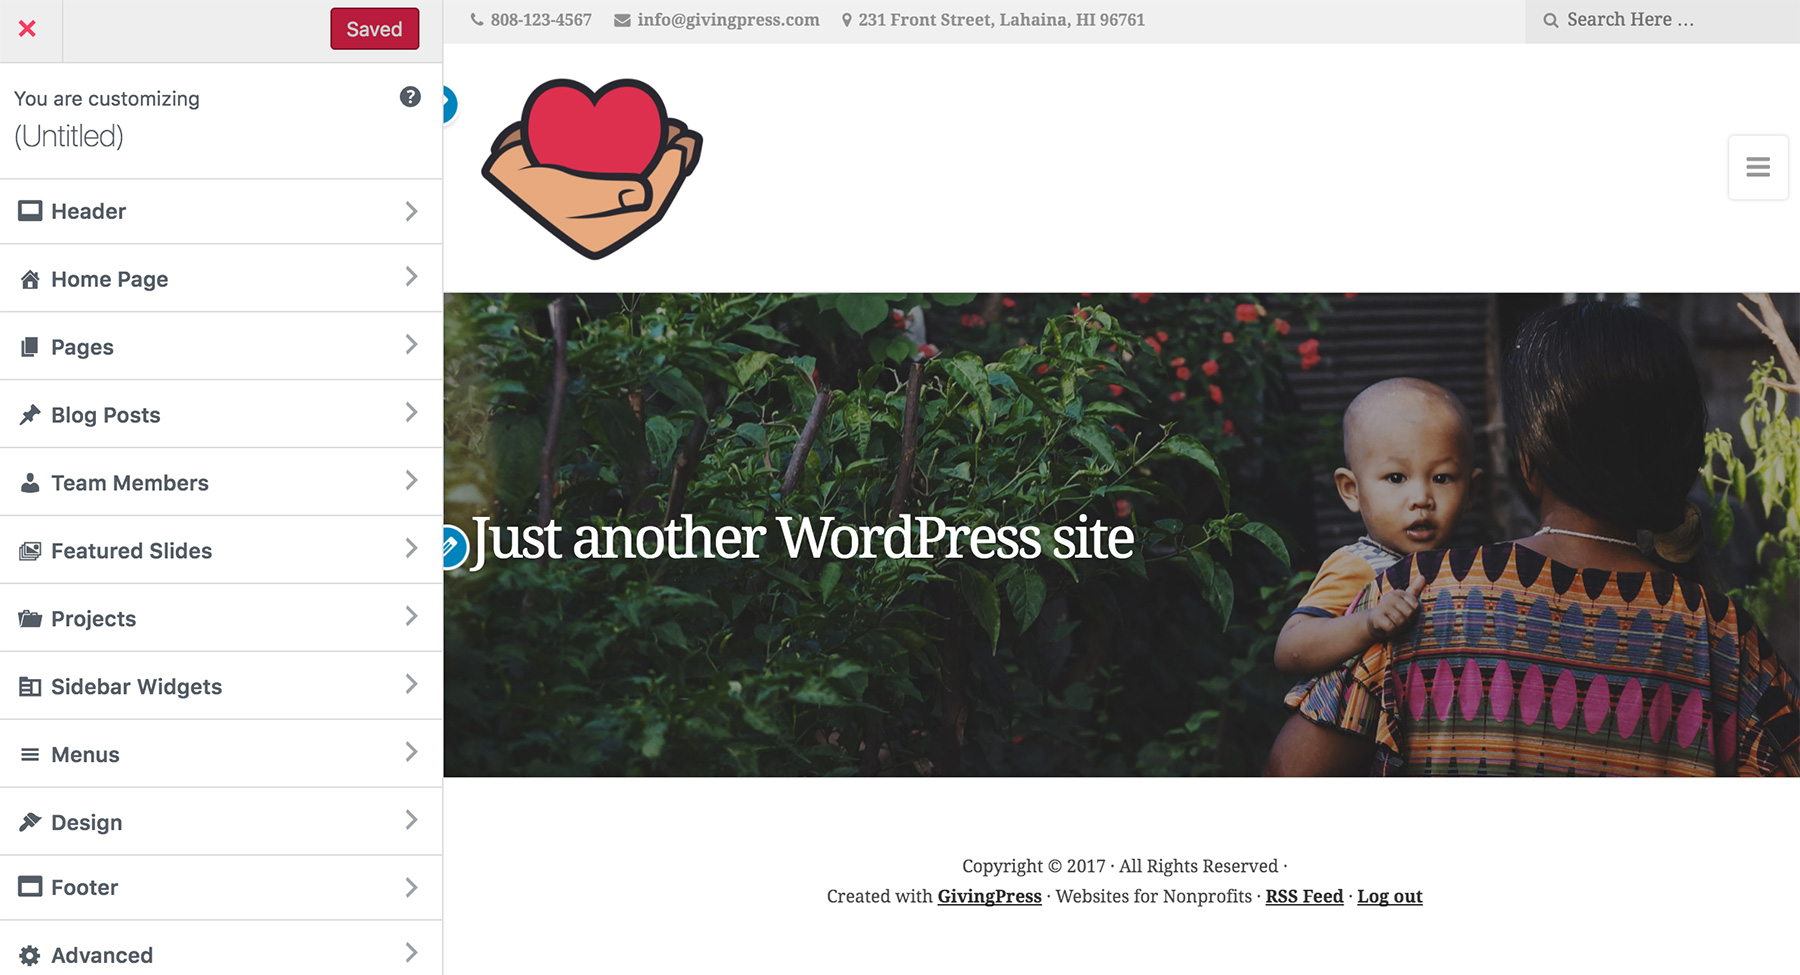
Once you’ve logged into your site, take a few minutes to get to know the customizer. The GivingPress customizer (the admin to the left of the screen) has been simplified to make it easier to navigate, while still providing a wide array of customization options. You can always refer to our Support & Documentations page for help with tasks such as adding a logo, creating a menu, or accepting donations. Below is an introduction to the way your GivingPress website builder is broken down.
Website Control Panel
When you log into your website you will be brought a “welcome” page, the Website Control Panel. The purpose of this page is to provide you with helpful quick links for things such as opening a support ticket, managing your account, and editing your site.
Site Builder
The Site Builder is where you will design and customize your website. It contains all the tools you will need to build and manage your site. You can see your changes in real time within the section to the right.
Donations
In order to create a donations section on your website, you will first need to create a donations form (learn more about creating a donations section here). The Donations section will walk you through the creation of your donations form.
Time To Start Building!
Within the Website Builder you can go ahead and start customizing your website as soon as the status of your site reads “Activated” within your accounts page. As you go along making your changes, don’t forget to hit the red “Save & Publish” button at the top – you can’t miss it! Also, when adding images to your website it is helpful to first make sure they are properly sized using an outside program, such as Adobe Photoshop. For customer support, please refer to our Support & Documentations page. Can’t find what you’re looking for there? Feel free to chat with us by clicking the red Intercom icon to the bottom right of our website and we would be glad to help. Please let us know if there’s anything we can do to make your experience better. We thank you for choosing GivingPress as your website solution!